How to Bake a Light and Airy Vanilla Sponge Cake: The Ultimate Guide to Perfection
There’s something magical about the moment you slice into a perfectly baked vanilla sponge cake—watching it spring back under gentle pressure, inhaling that sweet vanilla aroma, and knowing you’ve created something that will bring joy to everyone at the table. Whether it’s for a birthday celebration, afternoon tea, or simply because you deserve a homemade treat, mastering the art of a light and airy vanilla sponge cake is a skill that will serve you for life.
If you’ve ever experienced the disappointment of a dense, heavy cake when you were hoping for cloud-like perfection, you’re not alone. Many home bakers struggle with achieving that perfect, fluffy texture that makes a vanilla sponge cake truly exceptional. The good news? With the right techniques, quality ingredients, and a little patience, you can consistently create bakery-quality results in your own kitchen. Today, we’re going to change your baking game forever.
Table of Contents
What Makes a Vanilla Sponge Cake Light and Airy?
Understanding the science behind a perfect vanilla sponge cake is crucial for consistent success. The light, airy texture that defines an exceptional sponge cake comes from the incorporation of air during the mixing process and the proper balance of ingredients that create structure while maintaining tenderness.
The key to achieving this coveted texture lies in several critical factors:
Air Incorporation: The creaming method, where butter and sugar are beaten together until light and fluffy, creates countless tiny air pockets. These pockets expand during baking, creating the cake’s characteristic light texture.
Proper Gluten Development: Unlike bread, sponge cakes require minimal gluten development. Gentle folding techniques preserve the delicate air bubbles while providing just enough structure to support the cake.
Steam Leavening: The moisture in eggs creates steam during baking, which helps lift the cake and contributes to its airy structure. This is why room temperature eggs are crucial—they incorporate more easily and create better emulsification.
Chemical Balance: The right ratio of fat, sugar, and flour creates a tender crumb while maintaining structural integrity. Too much flour creates density, while too little results in collapse.
Essential Ingredients for the Perfect Vanilla Sponge Cake
Quality ingredients are the foundation of any exceptional vanilla sponge cake. Each component plays a specific role in creating that perfect light and airy texture we’re after.
Vanilla Sponge Cake Ingredients
| Ingredient | Quantity | Purpose | Quality Tips |
|---|---|---|---|
| Large eggs | 4 | Structure & leavening | Room temperature, fresh |
| Caster sugar | 100g | Sweetness & texture | Fine granules preferred |
| Self-raising flour | 100g | Structure | Sift before use |
| Pure vanilla extract | 2 tsp | Flavor | Avoid artificial vanilla |
| Unsalted butter | 100g | Moisture & flavor | Softened, not melted |
| Pinch of salt | 1/4 tsp | Flavor enhancement | Fine sea salt |
Understanding Each Ingredient’s Role
Eggs are the backbone of any sponge cake, providing both structure through proteins and leavening through trapped air and steam. Using eggs at room temperature ensures better incorporation and emulsification, resulting in a smoother batter and more even texture.
Caster sugar dissolves more easily than regular granulated sugar, creating a finer texture in your finished cake. The sugar not only sweetens but also tenderizes the cake by interfering with gluten development and helps trap air during the creaming process.
Self-raising flour provides the perfect balance of protein for structure and chemical leavening for lift. If you only have plain flour, add 1½ teaspoons of baking powder per 100g of flour. Always sift flour to remove lumps and add air, contributing to the cake’s lightness.
Pure vanilla extract provides depth of flavor that artificial vanilla simply cannot match. The alcohol in pure extract also helps carry flavors and contributes to the cake’s tender texture.
Butter adds richness, flavor, and moisture while contributing to the cake’s tender crumb. Properly softened butter (not melted) creams beautifully with sugar, creating the essential air pockets for lightness.
Step-by-Step Vanilla Sponge Cake Recipe
Creating the perfect light and airy vanilla sponge cake requires attention to technique as much as ingredients. Follow these detailed steps for foolproof results every time.
Preparation (Before You Begin)
Equipment Needed:
- Two 8-inch round cake pans or one 9-inch pan
- Electric mixer (stand or hand mixer)
- Large mixing bowls
- Fine-mesh sieve
- Rubber spatula
- Wire cooling racks
Preparation Steps:
- Preheat your oven to 180°C (160°C fan) or 350°F
- Grease your cake pans with butter and dust with flour, tapping out excess
- Line the bottom with parchment paper for easy removal
- Bring eggs to room temperature (place in warm water for 10 minutes if needed)
- Soften butter to room temperature—it should yield to gentle pressure but not be melted
Mixing Method for Maximum Airiness
Step 1: Creaming Butter and Sugar
Begin by creaming the softened butter and caster sugar together. This is arguably the most crucial step for achieving a light and airy vanilla sponge cake.
- Place softened butter in a large mixing bowl
- Add caster sugar and begin beating on medium speed
- Gradually increase to high speed and beat for 3-5 minutes
- The mixture should become pale, light, and noticeably increased in volume
- Scrape down bowl sides periodically to ensure even mixing
Visual Cues: Properly creamed butter and sugar will be almost white in color, fluffy in texture, and will have increased in volume by about one-third.
Step 2: Adding Eggs Gradually
Room temperature eggs incorporate more easily and create better emulsification, essential for cake structure.
- Beat eggs lightly in a separate bowl with vanilla extract
- Add eggs to creamed mixture one at a time, beating well after each addition
- If mixture appears to curdle, add a tablespoon of flour and continue beating
- Beat until mixture is smooth and well combined
Prevention Tip: Adding eggs slowly prevents curdling, which can result in a denser cake texture.
Step 3: Folding in Flour
This gentle incorporation method preserves the air bubbles created during creaming while providing structure.
- Sift flour and salt together
- Add half the flour mixture to the batter
- Using a large metal spoon or rubber spatula, fold gently from bottom to top
- Add remaining flour and fold until just combined
- Stop mixing as soon as no flour streaks remain
Critical Point: Overmixing at this stage develops gluten, resulting in a tough, dense cake. Fold gently and stop as soon as ingredients are combined.
Baking Your Vanilla Sponge Cake
Proper baking technique is essential for achieving the light, airy texture you’re after.
Baking Instructions:
- Divide batter evenly between prepared pans
- Gently level surface with a spatula
- Place in center of preheated oven
- Bake for 20-25 minutes without opening oven door
- Test for doneness: cake should spring back when lightly pressed and begin pulling slightly from pan sides
- A skewer inserted in center should come out clean or with just a few moist crumbs
Oven Discipline: Resist opening the oven door for the first 20 minutes. The sudden temperature drop can cause your carefully created air bubbles to collapse, resulting in a sunken cake.
Professional Tips for a Light and Airy Vanilla Sponge Cake
These professional techniques will elevate your vanilla sponge cake from good to exceptional:
Temperature Control Tips
- Room temperature ingredients mix more easily and create better emulsification
- Consistent oven temperature ensures even baking—consider using an oven thermometer
- Avoid temperature shocks by not opening the oven door prematurely
Mixing Mastery
- Proper creaming technique creates the foundation for lightness—don’t rush this step
- Sift flour twice for maximum lightness and even distribution
- Use the fold-and-cut method when incorporating flour to minimize gluten development
- Stop mixing immediately once ingredients are just combined
Structural Success
- Fill pans only two-thirds full to allow for proper rising
- Tap pans gently on counter before baking to release large air bubbles
- Cool gradually by leaving in pans for 10 minutes before turning out
Timing and Technique
- Start checking doneness 5 minutes before the recommended time
- Use the spring-back test in addition to the skewer test
- Cool completely before frosting or filling to prevent melting
Common Vanilla Sponge Cake Problems and Solutions
Even experienced bakers encounter challenges when making sponge cakes. Here’s how to diagnose and prevent common issues:
Why Your Sponge Cake Isn’t Light and Airy
| Problem | Likely Cause | Solution |
|---|---|---|
| Dense, heavy texture | Overmixing flour | Fold gently, stop when just combined |
| Sunken center | Oven door opened too early | Wait minimum 20 minutes before checking |
| Dry, crumbly cake | Overbaking or too much flour | Check doneness 5 minutes early, measure accurately |
| Uneven rise | Incorrect oven temperature | Use oven thermometer, check calibration |
| Curdled batter | Cold eggs or adding too quickly | Room temperature eggs, add gradually |
| Flat cake | Old baking powder or insufficient creaming | Fresh leavening agents, cream for full time |
Troubleshooting Dense Texture
If your vanilla sponge cake turns out dense instead of light and airy, consider these factors:
Overmixing: The most common culprit. Once flour is added, mix only until just combined. Overmixing develops gluten, creating a tough texture.
Incorrect ratios: Too much flour or too little fat can create density. Measure ingredients accurately, preferably by weight.
Under-creaming: Insufficient creaming of butter and sugar means fewer air pockets. Cream for the full recommended time until mixture is light and pale.
Temperature issues: Cold ingredients don’t incorporate well, leading to uneven texture. Ensure all ingredients are at room temperature before beginning.
Variations and Flavor Enhancements
Once you’ve mastered the basic vanilla sponge cake technique, these variations will add excitement to your baking repertoire:
Vanilla Sponge Cake Flavor Variations
Lemon Vanilla Sponge: Add zest of 2 lemons and replace 1 teaspoon vanilla with lemon extract for a bright, citrusy twist.
Almond Vanilla Combination: Replace 1 teaspoon vanilla with almond extract for a subtle nutty flavor that pairs beautifully with berry fillings.
Orange Vanilla Sponge: Add orange zest and a tablespoon of fresh orange juice for a sunny variation perfect for spring celebrations.
Chocolate Chip Vanilla: Fold in 75g mini chocolate chips after incorporating flour for added texture and flavor interest.
Filling and Frosting Ideas
Classic Buttercream: Light, sweet, and perfect for piping decorative borders and roses.
Fresh Cream and Berries: Whipped cream with fresh strawberries or raspberries creates an elegant, not-too-sweet option.
Jam and Cream: Traditional British-style with strawberry jam and freshly whipped cream.
Lemon Curd Filling: Tart lemon curd provides beautiful contrast to the sweet vanilla cake.
Chocolate Ganache: Rich and decadent, perfect for special occasions.
Storage and Serving Tips
Proper storage ensures your light and airy vanilla sponge cake maintains its texture and flavor:
Storage Best Practices
Short-term Storage (1-2 days):
- Store unfrosted cake wrapped in plastic wrap at room temperature
- Frosted cakes should be refrigerated and brought to room temperature before serving
Longer Storage (up to 1 week):
- Wrap individual layers in plastic wrap and store in airtight containers
- Refrigerate frosted cakes in covered containers
Freezing Guidelines:
- Unfrosted cake layers freeze beautifully for up to 3 months
- Wrap tightly in plastic wrap, then aluminum foil
- Thaw at room temperature while still wrapped to prevent condensation
Serving Suggestions
Temperature: Serve vanilla sponge cake at room temperature for best flavor and texture.
Portion sizes: A standard 8-inch cake serves 8-10 people generously.
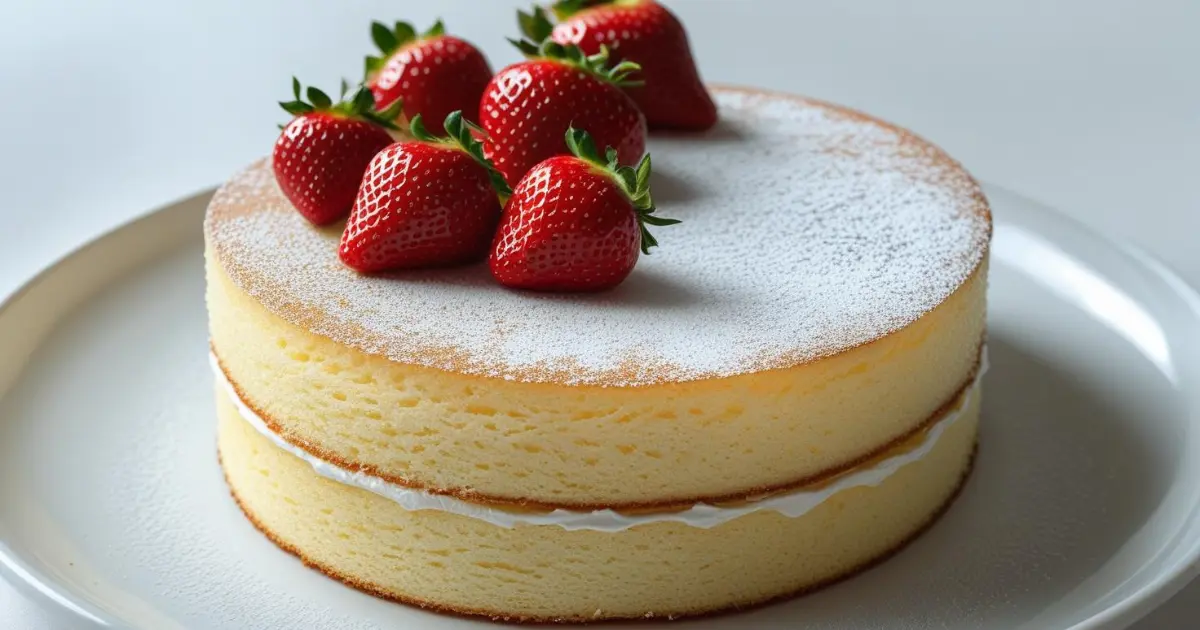
Presentation: Dust with powdered sugar for elegant simplicity, or dress up with fresh berries and mint.
Accompaniments: Serve with tea, coffee, or a glass of cold milk for the perfect afternoon treat.
Nutritional Information and Dietary Adaptations
Understanding the nutritional content and exploring adaptations makes this recipe accessible to more people:
Nutritional Breakdown (Per Slice, 8 servings)
| Nutrient | Amount | % Daily Value |
|---|---|---|
| Calories | 285 | 14% |
| Carbohydrates | 38g | 13% |
| Fat | 12g | 18% |
| Protein | 6g | 12% |
| Sugar | 28g | – |
| Fiber | 1g | 4% |
| Sodium | 180mg | 8% |
Dietary Modifications
Gluten-Free Vanilla Sponge Options: Replace self-raising flour with gluten-free flour blend plus 1½ teaspoons baking powder. Add 1 teaspoon xanthan gum if not included in flour blend.
Dairy-Free Alternatives: Substitute butter with equal amount of dairy-free butter or neutral oil. The texture will be slightly different but still delicious.
Sugar Reduction Techniques: Reduce sugar by up to 25% without significantly affecting texture. Consider natural sweeteners like coconut sugar for different flavor profiles.
Egg Alternatives: For each egg, substitute with 1 tablespoon ground flaxseed mixed with 3 tablespoons water, though texture will be denser.
Advanced Techniques for Professional Results
Take your vanilla sponge cake to the next level with these advanced techniques:
The Reverse Creaming Method
This alternative mixing method can produce an even more tender crumb:
- Combine flour, sugar, and salt in mixer bowl
- Add softened butter and mix on low speed until mixture resembles coarse crumbs
- Add wet ingredients gradually while mixing
- This method reduces gluten development for ultimate tenderness
Hot Milk Sponge Technique
Adding hot milk creates additional steam for extra lift:
- Heat 2 tablespoons milk until almost boiling
- Fold into finished batter just before baking
- Results in particularly light, moist texture
Cake Strip Method
For perfectly level cakes, use dampened fabric strips around pan sides to ensure even baking and prevent domed tops.
Conclusion
Mastering the art of a light and airy vanilla sponge cake is within every home baker’s reach. The key lies in understanding the science behind the technique, using quality ingredients, and respecting the gentle methods that preserve those crucial air bubbles. Remember that practice makes perfect—each time you bake, you’ll develop a better feel for the proper texture at each stage.
The satisfaction of creating a perfectly light, fluffy vanilla sponge cake that rivals any bakery creation is immense. Whether you’re celebrating a special occasion or simply treating your family to something homemade and delicious, this foundational recipe will serve you well for years to come.
Don’t be discouraged if your first attempt isn’t perfect. Even professional bakers had to learn these techniques through practice. Focus on the fundamentals: proper creaming, gentle folding, and patient baking. Soon, you’ll be creating vanilla sponge cakes that are consistently light, airy, and absolutely delicious.
Frequently Asked Questions (FAQ)
Why is my vanilla sponge cake not light and airy?
The most common reasons for a dense vanilla sponge cake include overmixing the batter after adding flour, using cold ingredients that don’t incorporate properly, insufficient creaming of butter and sugar, or opening the oven door too early during baking. Focus on gentle folding techniques, room temperature ingredients, and thorough creaming for best results.
How do I make my vanilla sponge cake more fluffy?
To achieve maximum fluffiness in your vanilla sponge cake, cream butter and sugar for the full recommended time until pale and increased in volume, sift flour twice before adding, fold ingredients gently using a cutting motion, and ensure all ingredients are at room temperature before beginning. Avoid overmixing once flour is added.
Can I make vanilla sponge cake without butter?
Yes, you can substitute butter with vegetable oil, melted coconut oil (cooled), or dairy-free butter alternatives. Use about 75% of the amount called for when using oil. The texture will be slightly different—more moist but less rich—but still delicious.
How long should I beat the vanilla sponge cake mixture?
Cream butter and sugar for 3-5 minutes until light and fluffy, add eggs gradually beating well after each addition (about 1 minute per egg), then fold in flour just until combined—usually 30-60 seconds. The key is thorough creaming but gentle folding.
What’s the secret to a perfectly risen vanilla sponge cake?
The secrets include using fresh baking powder, proper oven temperature (use a thermometer to verify), not opening the oven door for at least 20 minutes, ensuring ingredients are at room temperature, and thorough creaming to incorporate maximum air. Also, avoid overfilling pans—two-thirds full is ideal.
How do I know when my vanilla sponge cake is done baking?
Your vanilla sponge cake is done when it springs back lightly when touched in the center, begins to pull slightly from the pan sides, and a skewer inserted in the center comes out clean or with just a few moist crumbs. The cake should be golden brown and smell fragrant. Total baking time is typically 20-25 minutes at 180°C (350°F).