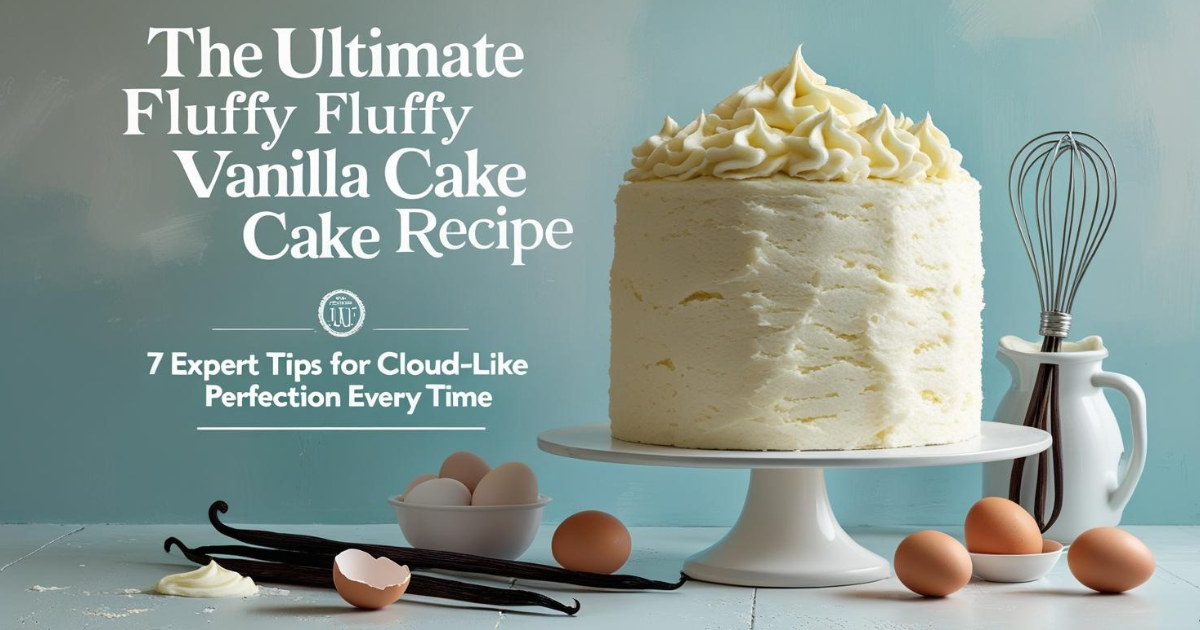
The Ultimate Fluffy Vanilla Cake Recipe: 7 Expert Tips for Cloud-Like Perfection Every Time
Do you remember the first time you bit into a truly perfect slice of vanilla cake? That moment when the fork glided through layers so tender they seemed to melt on your tongue, and the sweet, comforting aroma of vanilla transported you back to childhood birthday parties and grandmother’s kitchen? I’ll never forget mine – it was my daughter’s third birthday, and after three failed attempts at creating that dreamy, cloud-like texture, I was ready to give up on homemade cakes forever. But then I discovered the secrets that professional bakers have been using for decades, and everything changed. Today, I’m sharing those game-changing techniques that will transform your fluffy vanilla cake recipe from good to absolutely extraordinary.
Table of Contents
The difference between a mediocre cake and one that makes people close their eyes in pure bliss isn’t luck – it’s technique. After years of perfecting this craft and consulting with professional pastry chefs, I’ve distilled the art of cake making into seven essential principles that will revolutionize your baking forever.
The Science Behind the Perfect Fluffy Vanilla Cake Recipe
Understanding the science behind baking transforms you from someone who follows recipes blindly into a confident baker who can troubleshoot problems and achieve consistent results. When we talk about creating the perfect fluffy vanilla cake recipe, we’re essentially engineering a delicate network of proteins, starches, fats, and air bubbles that work together to create that coveted tender crumb.
Understanding Cake Structure and Texture
The magic of a fluffy vanilla cake lies in its cellular structure. Each bite should contain thousands of tiny air pockets surrounded by a tender protein network that’s been carefully developed through precise mixing techniques. The gluten in flour provides structure, but too much development creates a tough, chewy texture – the enemy of fluffiness.
Fat plays a crucial role by coating flour proteins, limiting gluten development while adding richness and moisture. Sugar doesn’t just sweeten; it tenderizes by interfering with protein networks and helps trap air during the creaming process. Meanwhile, eggs provide both structure through proteins and emulsification through lecithin, binding water and fat into a smooth, cohesive batter.
Temperature control affects every aspect of this delicate balance. Cold ingredients won’t emulsify properly, leading to dense, uneven textures. Hot ingredients can cause premature gluten development or even cook the eggs. This is why professional bakers are obsessive about ingredient temperatures – it’s not perfectionism, it’s science.
Essential Ingredients for Maximum Fluffiness
The foundation of any exceptional fluffy vanilla cake recipe begins with understanding how each ingredient contributes to the final texture. Quality matters enormously, but technique matters even more.
Choosing the Right Flour for Your Fluffy Vanilla Cake Recipe
Cake flour is the secret weapon most home bakers overlook. With only 6-8% protein compared to all-purpose flour’s 10-12%, cake flour creates a more tender crumb by limiting gluten development. The lower protein content means less structure, which translates directly to that melt-in-your-mouth texture we’re after.
If you don’t have cake flour on hand, you can create a substitute by removing 2 tablespoons of all-purpose flour from each cup and replacing it with 2 tablespoons of cornstarch. Sift this mixture at least three times to ensure even distribution. While not identical to commercial cake flour, this substitution will significantly improve your results.
When measuring flour, always use the spoon-and-level method or, better yet, weigh your ingredients. Cake flour should weigh approximately 125 grams per cup when properly measured. Scooping directly from the bag can pack up to 30% more flour into your measuring cup, leading to dense, heavy cakes.
The Role of Leavening Agents
Fresh baking powder is non-negotiable for achieving maximum lift in your fluffy vanilla cake recipe. Baking powder loses potency over time, and using expired leavening agents is one of the most common causes of flat, dense cakes. Test your baking powder by stirring a teaspoon into hot water – it should bubble vigorously.
Double-acting baking powder provides two rises: once when mixed with liquid ingredients and again when heated in the oven. This dual action creates more reliable results and gives you a longer working window before the batter loses its leavening power.
The ratio is critical – too little leavening results in dense cake, while too much creates a coarse, unstable crumb that may collapse. For vanilla cake, the ideal ratio is approximately 1 teaspoon of baking powder per cup of flour, adjusted based on other acidic ingredients in your recipe.
7 Professional Tips for the Fluffiest Vanilla Cake Recipe
These seven techniques separate amateur bakers from professionals. Master these principles, and you’ll consistently produce bakery-quality results that will have everyone begging for your recipe.
Tip #1 – Master the Creaming Method
The creaming method is the foundation of most fluffy vanilla cake recipes, and it’s where many home bakers go wrong. Proper creaming incorporates air into the batter while creating an emulsion between fat and sugar that traps moisture and creates tender texture.
Start with butter that’s been sitting at room temperature for about an hour – it should give slightly when pressed but still hold its shape. If you forget to take it out early, cut the butter into small pieces and let it sit for 15-20 minutes, or grate cold butter and let it come to temperature quickly.
Cream butter and sugar for a full 4-5 minutes at medium speed. The mixture should nearly double in volume, become pale yellow, and feel noticeably lighter when you lift the beaters. This process literally beats air into the mixture, creating the foundation for your cake’s light texture. Rushing this step is the number one mistake that leads to dense cakes.
Visual cues matter more than timing. Properly creamed butter and sugar will look almost white and fluffy, similar to thick whipped cream. If your mixture looks grainy or separated, continue beating – it will eventually come together into a smooth, fluffy mass.
Tip #2 – Room Temperature Ingredients Are Non-Negotiable
Cold ingredients simply cannot emulsify properly, no matter how long you mix them. This fundamental principle affects every aspect of your fluffy vanilla cake recipe’s success. When ingredients are at similar temperatures, they combine into a smooth, homogeneous batter that bakes evenly and creates superior texture.
Eggs should be at room temperature (about 70°F) for optimal incorporation. Cold eggs can cause the butter mixture to break, creating a lumpy batter that produces dense, uneven cake. If you forgot to take eggs out early, place them in a bowl of warm (not hot) water for 5-10 minutes.
Milk should also be at room temperature. Cold milk will solidify the butter in your creamed mixture, undoing all your careful work. If you need to warm milk quickly, microwave it for 10-15 seconds, stirring to distribute heat evenly.
Even vanilla extract performs better at room temperature, though this makes less difference than other ingredients. Store your vanilla in a cool, dark place, but let it come to room temperature before using it in delicate batters.
Tip #3 – The Alternating Addition Technique
The alternating method – adding dry and wet ingredients in alternating additions, beginning and ending with flour – isn’t just tradition. This technique minimizes gluten development while ensuring even distribution of ingredients throughout the batter.
Start by adding about one-third of your flour mixture to the creamed butter and sugar. Mix on low speed just until the flour disappears – no longer. Overmixing at this stage develops gluten, creating a tough cake. Add half the milk, mixing just until incorporated, then another third of the flour, the remaining milk, and finally the last of the flour.
Each addition should be mixed only until just combined. The batter may look slightly lumpy after the final flour addition – this is normal and preferred. Those small lumps will disappear during baking, but overmixed gluten won’t.
Stop mixing the moment you no longer see streaks of flour. Finish by giving the batter 2-3 gentle folds with a rubber spatula to ensure everything is evenly distributed, but resist the urge to achieve a perfectly smooth batter through continued mixing.
Tip #4 – Don’t Underestimate Vanilla Quality
The quality of vanilla extract significantly impacts both flavor and texture in your fluffy vanilla cake recipe. Pure vanilla extract contains alcohol, which evaporates during baking and creates tiny air pockets that contribute to the cake’s light texture. Imitation vanilla lacks this alcohol content and often contains stabilizers that can affect batter consistency.
High-quality pure vanilla extract should list only vanilla beans, alcohol, and water on the ingredient list. The alcohol content should be at least 35%, as required by FDA standards. Premium extracts often use multiple varieties of vanilla beans, creating complex flavor profiles that elevate simple vanilla cake from ordinary to extraordinary.
Vanilla bean paste offers even more intense flavor and adds beautiful vanilla bean specks throughout your cake. Use it in the same quantities as extract, but expect slightly denser results due to the added solids. For special occasions, this visual appeal often justifies the minimal texture change.
Store vanilla extract in a cool, dark place away from heat sources. Properly stored pure vanilla extract actually improves with age, developing deeper, more complex flavors over time. Replace imitation vanilla every 1-2 years, as its synthetic compounds break down and create off-flavors.
Tip #5 – Proper Pan Preparation for Even Baking
Pan preparation affects more than just release – it influences how your fluffy vanilla cake recipe bakes and develops its final texture. Proper preparation ensures even heat distribution and prevents the dreaded stuck cake that tears when removed.
Start with light-colored metal pans, which conduct heat evenly without creating hot spots. Dark pans absorb more heat, often causing over-browning and uneven baking. Glass pans retain heat longer, continuing to cook the cake even after removal from the oven.
Butter the pans thoroughly, paying special attention to corners and edges where sticking commonly occurs. Dust with flour, tapping out excess – this creates a barrier that prevents sticking while contributing to even browning. For extra insurance, line the bottom with parchment paper cut to fit exactly.
Pan size matters enormously for texture. Using pans that are too small creates thick layers that bake unevenly, with overdone edges and underdone centers. Too large, and your cake will be thin and dry. Standard 9-inch round pans with 2-inch sides are ideal for most fluffy vanilla cake recipes.
Tip #6 – Oven Temperature and Timing Precision
Oven temperature accuracy can make or break your fluffy vanilla cake recipe. Most home ovens run 15-25 degrees off their displayed temperature, and this variation significantly affects baking results. Invest in an oven thermometer and adjust accordingly – it’s one of the most important tools in your baking arsenal.
Preheat your oven for at least 20 minutes before baking. This ensures not just air temperature but also that oven walls, racks, and heating elements reach proper temperature for even heat distribution. Place your oven rack in the center position to promote even baking.
Resist opening the oven door during the first 20 minutes of baking. Temperature fluctuations during this critical period can cause cakes to fall or develop uneven textures. The cake needs consistent heat to set its structure properly.
Test for doneness using multiple methods. The cake should spring back when lightly touched in the center, pull slightly away from pan sides, and a toothpick inserted in the center should come out with just a few moist crumbs. Completely clean toothpicks often indicate overbaking.
Tip #7 – The Secret of Cake Flour Substitution
When cake flour isn’t available, creating an effective substitute requires understanding what makes cake flour special. The lower protein content and finer texture both contribute to tender results, and a simple substitution addresses both factors.
For every cup of cake flour called for in your fluffy vanilla cake recipe, measure 1 cup of all-purpose flour, remove 2 tablespoons, and replace with 2 tablespoons of cornstarch. The cornstarch further reduces protein content while adding tenderness.
Sift this mixture at least three times to achieve cake flour’s characteristic fine texture. This step is crucial – cornstarch tends to clump, and uneven distribution creates pockets of dense texture in your finished cake.
This substitution works well for most recipes, though the texture won’t be identical to using actual cake flour. For best results, especially for special occasions, invest in a box of cake flour. It stores well in the freezer and makes a noticeable difference in your results.
Step-by-Step Fluffy Vanilla Cake Recipe
Now that you understand the science and techniques, let’s put it all together into a recipe that delivers consistently spectacular results.
Ingredients
| Ingredient | Amount | Weight | Purpose | Notes |
|---|---|---|---|---|
| Cake flour | 2½ cups | 315g | Structure | Sift before measuring |
| Granulated sugar | 1¾ cups | 350g | Sweetness, texture | Fine crystal preferred |
| Unsalted butter | ¾ cup | 170g | Fat, flavor | Room temperature |
| Large eggs | 3 whole | ~150g | Binding, structure | Room temperature |
| Whole milk | 1 cup | 240ml | Moisture | Room temperature |
| Pure vanilla extract | 2 teaspoons | 8ml | Flavor | High-quality preferred |
| Baking powder | 2½ teaspoons | 10g | Leavening | Fresh, double-acting |
| Salt | ½ teaspoon | 3g | Flavor enhancement | Fine sea salt |
Equipment Needed for Perfect Results
Having the right tools makes achieving professional results much easier. While you can make this fluffy vanilla cake recipe with basic equipment, investing in quality tools pays dividends in consistency and ease of use.
Essential equipment includes a stand mixer or high-quality hand mixer, two 9-inch round cake pans with 2-inch sides, a digital kitchen scale for accuracy, and measuring cups and spoons for volume measurements. You’ll also need large mixing bowls, a rubber spatula for gentle folding, wire cooling racks, and an oven thermometer for temperature accuracy.
Optional but helpful tools include a bench scraper for easy batter transfer, offset spatulas for smooth frosting application, and cake strips that wrap around pans to promote even baking. Professional bakers swear by these strips, which keep pan edges cooler and prevent domed tops.
Detailed Instructions
Preparation Phase (15 minutes)
Begin by setting all ingredients on the counter to come to room temperature – this typically takes 1-2 hours for butter and 30 minutes for eggs and milk. Plan ahead, as this step cannot be rushed without compromising results.
Preheat your oven to 350°F (175°C), positioning the rack in the center. Verify temperature with an oven thermometer if available. Prepare your pans by buttering thoroughly, dusting with flour, and tapping out excess. Line bottoms with parchment paper for extra insurance.
Sift cake flour three times to ensure lightness and even texture. This extra step makes a noticeable difference in the final cake’s tenderness. Measure other dry ingredients and set aside. Have all wet ingredients measured and ready – timing matters once you begin mixing.
Mixing Process (20 minutes)
Creaming Stage (5-7 minutes): In your mixer bowl, cream butter and sugar at medium speed until the mixture is pale, fluffy, and has nearly doubled in volume. This takes longer than most recipes suggest – don’t rush this crucial step. The mixture should look almost white and feel noticeably lighter when you lift the beaters.
Properly creamed butter and sugar will have a smooth, almost whipped cream-like consistency. If your mixture looks grainy or separated, continue beating – it will eventually come together. The temperature of your butter is crucial here; too cold and it won’t cream properly, too warm and it won’t hold air.
Egg Incorporation (2-3 minutes): Add eggs one at a time, beating well after each addition. Each egg should be fully incorporated before adding the next. The mixture may look slightly curdled after adding eggs – this is normal and will smooth out as you continue mixing.
If your mixture breaks or curdles severely, try adding a tablespoon of flour and beating until smooth. This helps stabilize the emulsion and prevents the batter from separating further.
Alternating Additions (8-10 minutes): Reduce mixer speed to low. Add flour mixture in three additions, alternating with milk in two additions, beginning and ending with flour. Mix each addition only until just combined – you should still see slight streaks of flour after the final addition.
This is where restraint pays off. Overmixing at this stage develops gluten, creating a tough, dense cake. The batter should look slightly lumpy and heterogeneous – it will smooth out during baking.
Finish by adding vanilla extract and mixing just until distributed. Give the batter 2-3 gentle folds with a rubber spatula to ensure even distribution, but avoid overmixing.
Baking and Cooling Process
Divide batter evenly between prepared pans – a kitchen scale ensures perfect distribution. Level the surface gently with an offset spatula, then tap pans on the counter to release air bubbles.
Bake for 25-30 minutes, rotating pans halfway through for even browning. Avoid opening the oven door during the first 20 minutes, as temperature fluctuations can cause the delicate structure to collapse.
Test for doneness when the tops are golden and the cake begins pulling slightly from pan sides. A toothpick inserted in the center should come out with just a few moist crumbs. The cake should spring back when lightly touched in the center.
Cool in pans for 10 minutes, then run a knife around edges to loosen. Turn out onto wire racks and cool completely before frosting. This cooling period allows the structure to firm up and makes the cake easier to handle.
Troubleshooting Common Fluffy Vanilla Cake Recipe Problems
Even experienced bakers encounter issues occasionally. Understanding common problems and their solutions helps you troubleshoot on the fly and prevent future failures.
Dense or Heavy Cake Issues
Dense cakes typically result from overmixing, incorrect measurements, or temperature problems. Overmixing develops gluten, creating a tough, chewy texture instead of the tender crumb we want in a fluffy vanilla cake recipe.
Measurement errors, particularly too much flour, are another common culprit. Always measure flour by spooning it into measuring cups and leveling with a knife, or better yet, use a kitchen scale for accuracy. Scooping flour directly from the container can add 20-30% more flour than intended.
Cold ingredients prevent proper emulsification, leading to dense textures. Even if your batter looks smooth, cold ingredients won’t create the proper cellular structure necessary for light, fluffy results. Plan ahead and allow adequate time for ingredients to reach room temperature.
Expired or insufficient leavening agents also create dense results. Baking powder loses potency over time, so replace it every 6-12 months. Test by stirring a teaspoon into hot water – fresh baking powder should bubble vigorously immediately.
Sunken or Collapsed Cake Centers
Sunken centers typically indicate underbaking, temperature fluctuations, or leavening problems. The cake’s structure hasn’t set properly, causing it to collapse as it cools and loses steam.
Opening the oven door too early disrupts the delicate setting process. The cake needs consistent heat during the first 20-25 minutes to develop its structure. Even brief temperature drops can cause partial or complete collapse.
Overmixing can also cause sinking by breaking down the air bubbles created during creaming. Once this cellular structure is damaged, no amount of leavening can compensate. Mix only until ingredients are just combined.
Altitude affects baking significantly. At elevations above 3,000 feet, reduce baking powder by 1/8 teaspoon per teaspoon called for, increase oven temperature by 15-25°F, and reduce baking time slightly. The lower air pressure causes excessive rising and subsequent collapse.
Dry or Crumbly Texture Problems
Dry cakes usually result from overbaking, insufficient fat, or using the wrong type of flour. Even a few minutes of overbaking can transform a moist, tender cake into a dry disappointment.
Use visual and physical cues rather than relying solely on timing. The cake should spring back when lightly touched and pull slightly from pan sides. A toothpick should come out with a few moist crumbs – completely clean toothpicks often indicate overbaking.
Ingredient ratios matter enormously. Too much flour relative to fat and liquid creates dry results. This is another reason why accurate measuring is crucial to success in any fluffy vanilla cake recipe.
Storage affects moisture retention. Wrap cooled, unfrosted cakes tightly in plastic wrap to prevent moisture loss. Properly stored cakes actually improve slightly overnight as moisture redistributes throughout the crumb.
Variations and Flavor Enhancements
Once you’ve mastered the basic fluffy vanilla cake recipe, these variations add interest while maintaining the tender texture you’ve worked so hard to achieve.
Classic Fluffy Vanilla Cake Recipe Modifications
Buttermilk Vanilla Cake Variation
Buttermilk adds tangy flavor and creates an incredibly tender crumb through its acidity. The acid reacts with baking soda to provide additional lift while tenderizing proteins for superior texture.
| Original Ingredient | Replacement | Amount | Additional Changes |
|---|---|---|---|
| Whole milk | Buttermilk | 1 cup | Add ¼ tsp baking soda |
| Baking powder | Reduce amount | 2 teaspoons | Balance acid with soda |
| Sugar | Can reduce slightly | 1⅔ cups | Buttermilk adds subtle sweetness |
The technique remains identical, but the acid in buttermilk requires balancing with baking soda for proper leavening. This combination creates exceptionally tender results that many professional bakers prefer for wedding cakes and special occasions.
Sour Cream Enhancement
Adding sour cream to your fluffy vanilla cake recipe creates incredibly moist results with a subtle tang that enhances vanilla flavor. Replace ¼ cup of the milk with sour cream, and reduce butter by 2 tablespoons to maintain proper fat balance.
Sour cream’s acidity tenderizes gluten while its fat content adds richness. The proteins in sour cream also help create a finer, more stable crumb structure. This variation keeps exceptionally well and actually improves in flavor and texture overnight.
Mix sour cream with the milk before adding to maintain smooth incorporation. Cold sour cream can cause the butter mixture to seize, so ensure it’s at room temperature like other ingredients.
Frosting Pairings for Fluffy Vanilla Cake
The delicate flavor and tender texture of fluffy vanilla cake pairs beautifully with various frostings, from simple buttercream to elaborate Swiss meringue preparations.
Classic vanilla buttercream complements without competing, allowing the cake’s subtle vanilla flavor to shine. American buttercream is easiest for beginners, while Swiss or Italian meringue buttercreams offer silkier textures and less sweetness.
Cream cheese frosting adds tangy richness that balances vanilla’s sweetness perfectly. The slight acidity brightens flavors while the creamy texture provides lovely contrast to the cake’s light crumb.
Fresh fruit and lightly sweetened whipped cream create an elegant, less sweet option perfect for summer entertaining. The cake’s sturdy-yet-tender texture holds up well to fruit juices without becoming soggy.
For chocolate lovers, a rich chocolate ganache or fudgy chocolate buttercream creates beautiful flavor contrast while maintaining textural harmony. The vanilla cake provides a perfect neutral canvas for bold chocolate flavors.
Storage and Serving Tips
Proper storage maintains the texture and flavor you’ve worked so hard to achieve, while proper serving techniques ensure each slice looks as good as it tastes.
Proper Storage for Maximum Freshness
Unfrosted cake layers store best wrapped tightly in plastic wrap at room temperature. The plastic prevents moisture loss while allowing the cake to continue its gentle maturation process – flavors actually improve and texture becomes more tender over the first 24 hours.
For longer storage, wrap plastic-wrapped layers in aluminum foil and freeze for up to 3 months. Frozen cake layers actually slice more cleanly when partially thawed, making them easier to work with for decorating.
Frosted cakes require different storage depending on the frosting type. Buttercream-frosted cakes can sit at room temperature for 2-3 days if ambient temperature stays below 70°F. Higher temperatures require refrigeration to prevent frosting from breaking or melting.
Cream cheese frostings and fresh fruit toppings always require refrigeration. Cover loosely with plastic wrap or store in cake carriers to prevent absorption of refrigerator odors. Allow refrigerated cakes to come to room temperature for 30-60 minutes before serving for best flavor and texture.
Storage Timeline Reference
- Room temperature (unfrosted): 2-3 days in plastic wrap
- Room temperature (buttercream frosted): 2-3 days under cake dome
- Refrigerated (any frosting): 5-7 days covered
- Frozen (unfrosted layers): 3 months wrapped in plastic and foil
- Frozen (frosted): 1 month in airtight container
Serving and Presentation Ideas
Serve this fluffy vanilla cake recipe at room temperature for optimal flavor and texture. Cold cake, while not harmful, mutes flavors and firms texture unnecessarily.
For clean slices, use a sharp, thin-bladed knife dipped in warm water and wiped clean between cuts. This prevents dragging and ensures each slice looks professional.
Standard serving sizes are typically 12-14 pieces from a 9-inch round cake, but adjust based on occasion and accompanying foods. Wedding cake portions are traditionally smaller, while birthday party servings can be more generous.
Garnish simply to let the cake’s flavor and texture shine. Fresh berries, a light dusting of powdered sugar, or delicate herb sprigs complement without competing. The goal is enhancement, not distraction from your perfectly executed fluffy vanilla cake recipe.
Professional Baker Secrets
These advanced techniques separate truly exceptional cakes from merely good ones. Once you’ve mastered the basics, these refinements will elevate your results to professional levels.
Advanced Techniques for Bakery-Quality Results
Professional bakers weigh ingredients rather than measuring by volume. Digital scales eliminate variables introduced by measuring technique, humidity, and ingredient settling. Once you start weighing ingredients, you’ll wonder how you ever baked without a scale.
Temperature control extends beyond ingredient temperature to environmental factors. Professional kitchens maintain consistent temperatures and humidity levels because these factors affect everything from creaming efficiency to baking times. While home bakers can’t control their environment completely, awareness helps you adjust techniques accordingly.
Ingredient sourcing makes a difference in professional settings. European-style butter has lower water content and higher fat content, creating richer flavors and better textures. Premium vanilla extracts use multiple bean varieties for complex flavor profiles. While these upgrades aren’t necessary for success, they do create noticeable improvements.
Quality equipment pays dividends in consistency and ease of use. Professional-grade stand mixers maintain steady speeds under load, ensuring consistent creaming. Heavy-duty pans distribute heat evenly and maintain their shape. Invest gradually in quality tools as your skills and interest develop.
Scaling Recipes Up or Down
Scaling cake recipes requires more than simple multiplication or division. Leavening agents don’t scale linearly – doubled recipes often need slightly less than double the baking powder to prevent over-rising and collapse.
Pan size affects baking time and temperature. Smaller pans require higher temperatures and shorter times, while larger pans need lower temperatures and longer times for even cooking. Layer thickness dramatically impacts these calculations.
| Recipe Size | Pan Configuration | Baking Temperature | Approximate Time | Servings |
|---|---|---|---|---|
| Half batch | One 8-inch round | 350°F (175°C) | 25-30 minutes | 8-10 |
| Full batch | Two 9-inch rounds | 350°F (175°C) | 28-35 minutes | 12-14 |
| 1.5x batch | Two 10-inch rounds | 325°F (163°C) | 35-40 minutes | 18-20 |
| Double batch | Sheet pan (13×18) | 325°F (163°C) | 40-45 minutes | 24-28 |
Mixing times also scale – larger batches require longer creaming times to achieve proper volume, while smaller batches can be overmixed more easily. Adjust your technique based on batch size and monitor visual cues rather than relying solely on timing.
FAQ Section: Fluffy Vanilla Cake Recipe
Frequently Asked Questions
Q: What makes a fluffy vanilla cake recipe different from a regular vanilla cake?
A: A fluffy vanilla cake recipe focuses on specific techniques that maximize air incorporation and minimize gluten development. Key differences include using cake flour instead of all-purpose flour, proper creaming techniques that can take 5-7 minutes, room temperature ingredients for better emulsification, and the alternating addition method to prevent overmixing. These techniques work together to create a lighter, more tender crumb structure.
Q: Can I use all-purpose flour instead of cake flour in my fluffy vanilla cake recipe?
A: Yes, but you’ll need to make a substitution to achieve similar results. For every cup of cake flour, use ¾ cup plus 2 tablespoons of all-purpose flour mixed with 2 tablespoons of cornstarch. Sift this mixture three times to ensure even distribution. The texture won’t be identical to using actual cake flour, but it will be significantly lighter than using straight all-purpose flour.
Q: Why did my fluffy vanilla cake recipe result in a dense cake?
A: Dense cakes typically result from several common issues: overmixing the batter after adding flour (which develops tough gluten), using cold ingredients that don’t emulsify properly, measuring flour incorrectly (too much flour makes dense cake), expired leavening agents that don’t provide adequate lift, or insufficient creaming time that doesn’t incorporate enough air. The most common culprit is overmixing – mix only until you just barely can’t see flour streaks.
Q: How do I know when my fluffy vanilla cake recipe is perfectly baked?
A: Use multiple tests for accuracy: the cake should spring back when lightly touched in the center, pull slightly away from the pan sides, and a toothpick inserted in the center should come out with just a few moist crumbs (not completely clean, which indicates overbaking). The top should be golden brown and the cake should smell fragrant. Internal temperature should reach 205-210°F (96-99°C) if you use a thermometer.
Q: Can I make this fluffy vanilla cake recipe ahead of time?
A: Absolutely! Unfrosted cake layers actually improve in texture and flavor over the first 24 hours as moisture redistributes. Wrap cooled layers tightly in plastic wrap and store at room temperature for up to 3 days, or freeze for up to 3 months. Frosted cakes can be made 1-2 days ahead and stored covered at room temperature (for buttercream) or refrigerated (for cream cheese frosting).
Q: What’s the secret to getting my fluffy vanilla cake recipe extra moist?
A: Several techniques enhance moisture: don’t overbake (even 2-3 minutes makes a difference), use room temperature ingredients for better emulsion, consider substituting buttermilk for regular milk to add tenderness, or replace some milk with sour cream for richness. Proper storage is also crucial – wrap unfrosted cakes tightly to prevent moisture loss.
Q: My fluffy vanilla cake recipe always turns out with a domed top. How do I get flat layers?
A: Domed tops usually indicate oven temperature that’s too high, causing the outside to set before the center finishes rising. Try reducing oven temperature by 25°F and baking slightly longer. You can also use cake strips (fabric strips soaked in water and wrapped around pans) to insulate the edges and promote even rising. Ensure your oven rack is in the center position for even heat distribution.
Q: Can I double this fluffy vanilla cake recipe for a larger crowd?
A: Yes, but with adjustments. When doubling, use slightly less than double the leavening agents (about 1.8x instead of 2x) to prevent over-rising. You’ll need longer creaming time for larger batches, and mixing requires more attention to prevent overworking. Consider baking in multiple batches rather than trying to fit everything in the oven at once for more consistent results.
Conclusion
Creating the perfect fluffy vanilla cake recipe isn’t just about following instructions – it’s about understanding the science behind each technique and ingredient. From the careful creaming of butter and sugar that incorporates thousands of air bubbles to the precise timing of ingredient additions that preserves the delicate emulsion, every step plays a crucial role in achieving that coveted cloud-like texture we all crave.
The seven professional tips shared in this comprehensive guide have transformed countless home bakers from frustrated cake makers into confident dessert creators. The difference between success and disappointment often comes down to seemingly small details: taking the time to properly cream butter and sugar, ensuring all ingredients are at room temperature, and resisting the urge to overmix once flour is added.
Remember that baking is both an art and a science. While creativity has its place in decoration and flavor combinations, the foundation techniques for achieving perfect texture are non-negotiable. The creaming method, alternating additions, and proper baking temperatures aren’t suggestions – they’re requirements for consistently excellent results.
This fluffy vanilla cake recipe serves as more than just instructions for one dessert. It’s a masterclass in fundamental baking techniques that will improve every cake you make moving forward. The skills you develop perfecting this recipe – recognizing proper creaming, understanding ingredient temperatures, and judging doneness – transfer directly to countless other baking projects.
Whether you’re celebrating a child’s birthday, marking a special anniversary, or simply wanting to fill your home with the comforting aroma of vanilla cake, these techniques will ensure your success every single time. The joy on faces around your table when they bite into perfectly fluffy, tender cake makes every minute of careful technique worthwhile.
The journey from dense, disappointing cakes to bakery-quality masterpieces starts with your very next batch. Trust the process, follow these proven techniques, and prepare to be amazed by the incredible results your fluffy vanilla cake recipe will deliver. Soon, you’ll be the baker everyone turns to for special occasions, and your vanilla cake will become the standard by which